
The BepInEx console will not appear when launching like it does for other games on Thunderstore. This is normal (and helps prevent crashes during startup). You can turn it back on in your BepInEx.cfg file.
Settings Extender
An extremely simple way to add new pages to the Settings window.
| Date uploaded | a week ago |
| Version | 0.0.1 |
| Download link | JSPAPP-Settings_Extender-0.0.1.zip |
| Downloads | 13447 |
| Dependency string | JSPAPP-Settings_Extender-0.0.1 |
This mod requires the following mods to function
BepInEx-BepInExPack_PEAK
BepInEx pack for PEAK. Preconfigured and ready to use.
Preferred version: 5.4.2403README
Settings Extender
An extremely simple way to add new pages to the Settings window.
Who is this for?
Dependencies and modders. This will either be required for a mod you want to use, or you want to include it as part of your own mod to have in-game settings.
Installation
The contents of plugins/ is moved into PEAK/BepInEx/plugins/.
How to use in a mod
Include DLL reference
Add a line like so similar to others in your .csproj file to include it in your project:
<ItemGroup>
    <Reference Include="PEAK\BepInEx\plugins\SettingsExtender.dll" />
</ItemGroup>
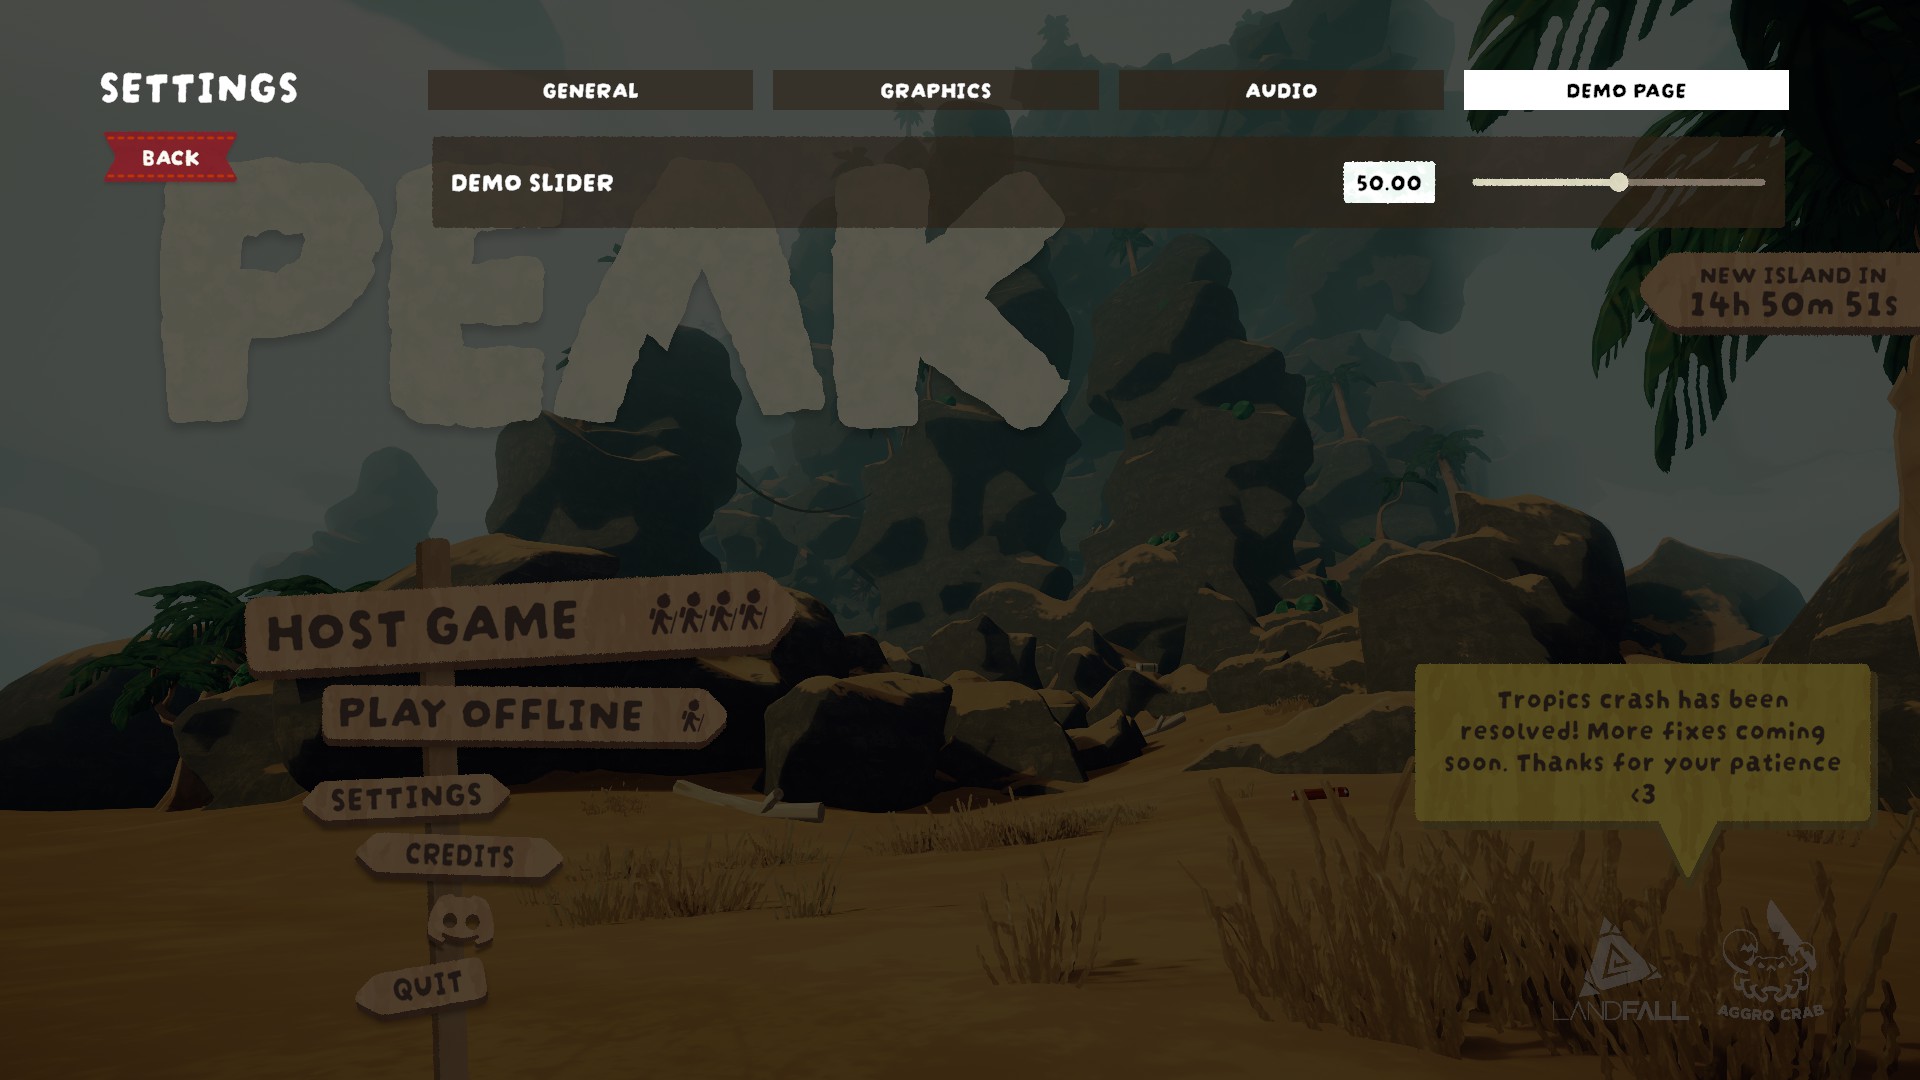
Register page
Call SettingsRegistry.Register(string pageName) in your plugin's Awake method:
using BepInEx;
using SettingsExtender;

public class Plugin : BaseUnityPlugin
{
    private void Awake()
    {
        SettingsRegistry.Register("Demo Page");
    }
}
Create settings
This isn't a tutorial, but you'll need to create a class for each setting you want to include. There's a couple built-in under Zorro.Settings in the assembly, check them out and how PEAK uses them (like FovSetting).
public class DemoSliderSetting : FloatSetting, IExposedSetting
{
    public string GetDisplayName()
    {
        return "Demo Slider";
    }

    public string GetCategory()
    {
        // Get our fake SettingsCategory id as a string
        return SettingsRegistry.GetPageId("Demo Page");
    }

    protected override float GetDefaultValue()
    {
        return 50;
    }

    protected override float2 GetMinMaxValue()
    {
        return new float2(0, 100);
    }

    public override void ApplyValue()
    {
        //
    }
}
Add settings
Once your setting is created, include it by setting it up with SettingsHandler in your plugin's Start method:
private void Start()
{
    SettingsHandler.Instance.AddSetting(new DemoSliderSetting());
}
Once that's added it'll get picked up and included on the settings menu.