Visuals Modifier
Allows the modification of materials at runtime based on configuration files.
| Last updated | 2 years ago |
| Total downloads | 1422 |
| Total rating | 2 |
| Categories | Tools Server-side Client-side Utility Mistlands Update Ashlands Update |
| Dependency string | Rexabyte-Visuals_Modifier-0.2.0 |
| Dependants | 3 other packages depend on this package |
README
Visuals Modifier
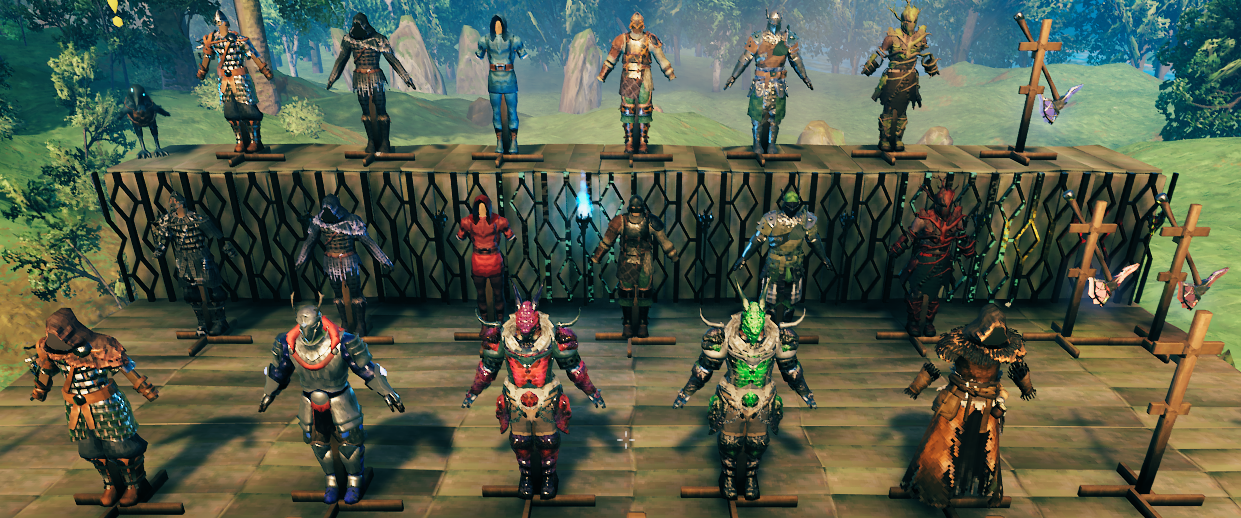
Allows the modification of materials at runtime based on configuration files. This mod can be used with or without WackysDatabase.
Features
- Modify material properties values at runtime.
- File watcher support for realtime material updates based on file changes, these will effect existing prefabs already in the world.
- Realtime effects based on proximity, time, and biome.
- Includes support for WackysDatabase
- ServerSync
Initial Workflow
- Run
vm_describe <Prefab>in the console to export a description of an items materials. The file will be exported to./BepInEx/config/Visuals/Describe_<Prefab>.yml. See an example output below. - Make note of the material properties as these are the values you can modify.
- Create a new file:
./BepInEx/config/Visuals/Visual_<Prefab>.yml - Inside the file start by setting the prefab name
prefabName: <Prefab> - From here there are a few different things you can do, the customizations can be as lite as you need them to be.
Customizations
- Update all materials with a single configuration.
- Updating specific materials with a more precise configuration targeting each individual material.
- Update an underlying texture of a material
- Add a material change based on a realtime effect
- Update a light on an item
Results
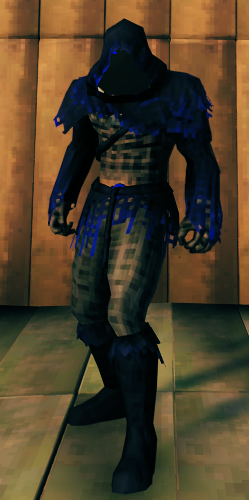
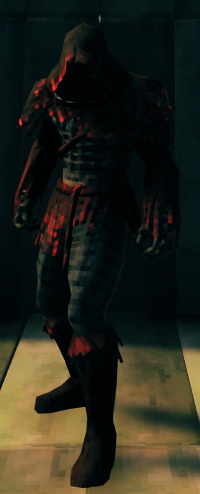

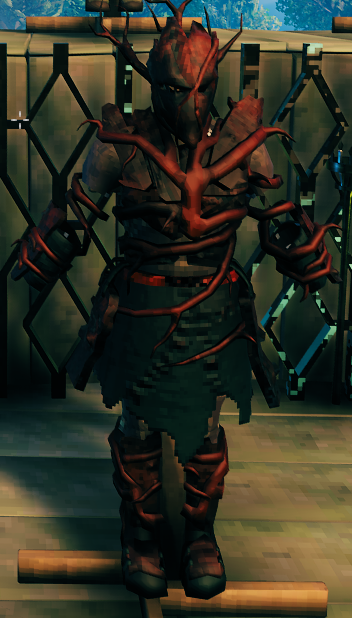
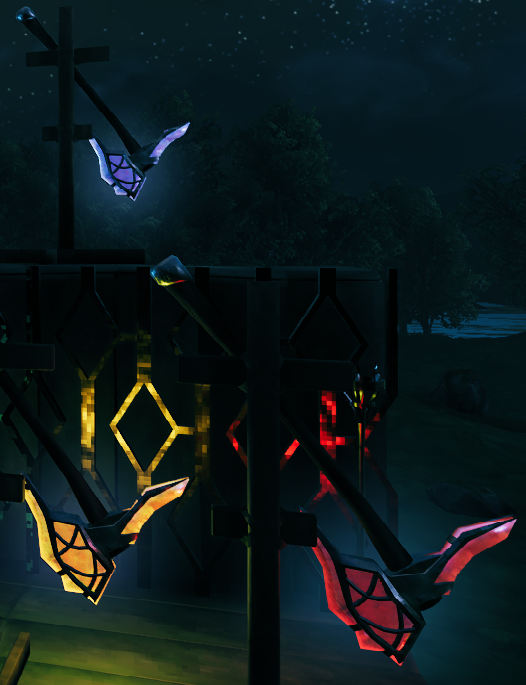
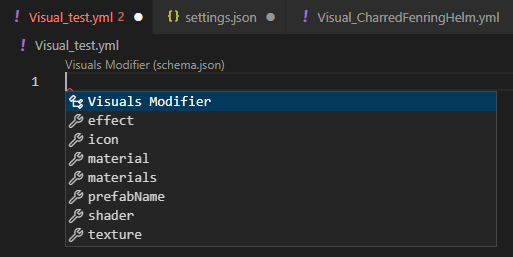
VSCode - Intellisense
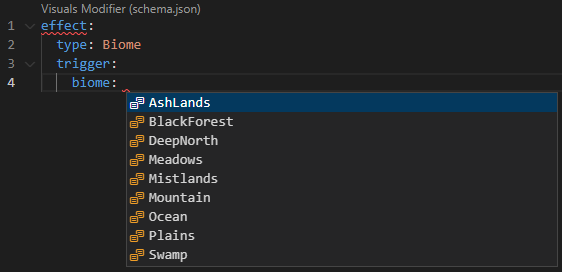
There is now a defined JSON schema that can be used with the VSCode YAML extension in order to provide more information while configurating items.
Example
Installation
- Install the 'YAML' extension
- Open the 'Visuals' folder in VSCode
- Go to 'Settings' in r2modman
- Select
Browse Profile Folder - Select Bepinex/config/Visuals
- Copy the folder path
- Open workspace settings
Ctrl + Shift + P- Type
Workspace - Select
Open Workspace Settings
- Type
Schemas - Select
Edit in settings.jsonunderYaml: Schemas - Make sure the file looks like this:
{
    "yaml.schemas": {
        "https://raw.githubusercontent.com/Rexabit/valheim-visuals-modifier/master/Documentation/schema.json": "/*",
    }
}
Getting Started
Schema - Base
prefabName: string
material: # Targets all materials in the renderer
  colors:
    <MATERIAL_PROPERTY_NAME>: [Red (decimal), Green (decimal), Blue (decimal), Alpha (decimal)]
  floats:
    <MATERIAL_PROPERTY_NAME>: (decimal)
materials:
- colors: # Targets the first material in the renderer
    <MATERIAL_PROPERTY_NAME>: [Red (decimal), Green (decimal), Blue (decimal), Alpha (decimal)]
  floats:
    <MATERIAL_PROPERTY_NAME>: (decimal)
- colors: # Targets the second material in the renderer
    <MATERIAL_PROPERTY_NAME>: [Red (decimal), Green (decimal), Blue (decimal), Alpha (decimal)]
  floats:
    <MATERIAL_PROPERTY_NAME>: (decimal)
shader: # Modifies the shader used and material instances on the item
  material: string (override the materials on the item to this material)
  materials: array<string> (override specific materials on the item using the materials in this array)
  name: string (name of the shader)
icon: # Modify the rotation of the icon for an item
  x: rotation X degrees (decimal)
  y: rotation Y degrees (decimal)
  z: rotation Z degrees (decimal)
light: # Modifies light renderers
  color: [Red (decimal), Green (decimal), Blue (decimal), Alpha (decimal)]
  range: float
Do not include changes for both 'material' & 'materials', use one or the other. This goes for the shader section as well.
Schema - Time Effect
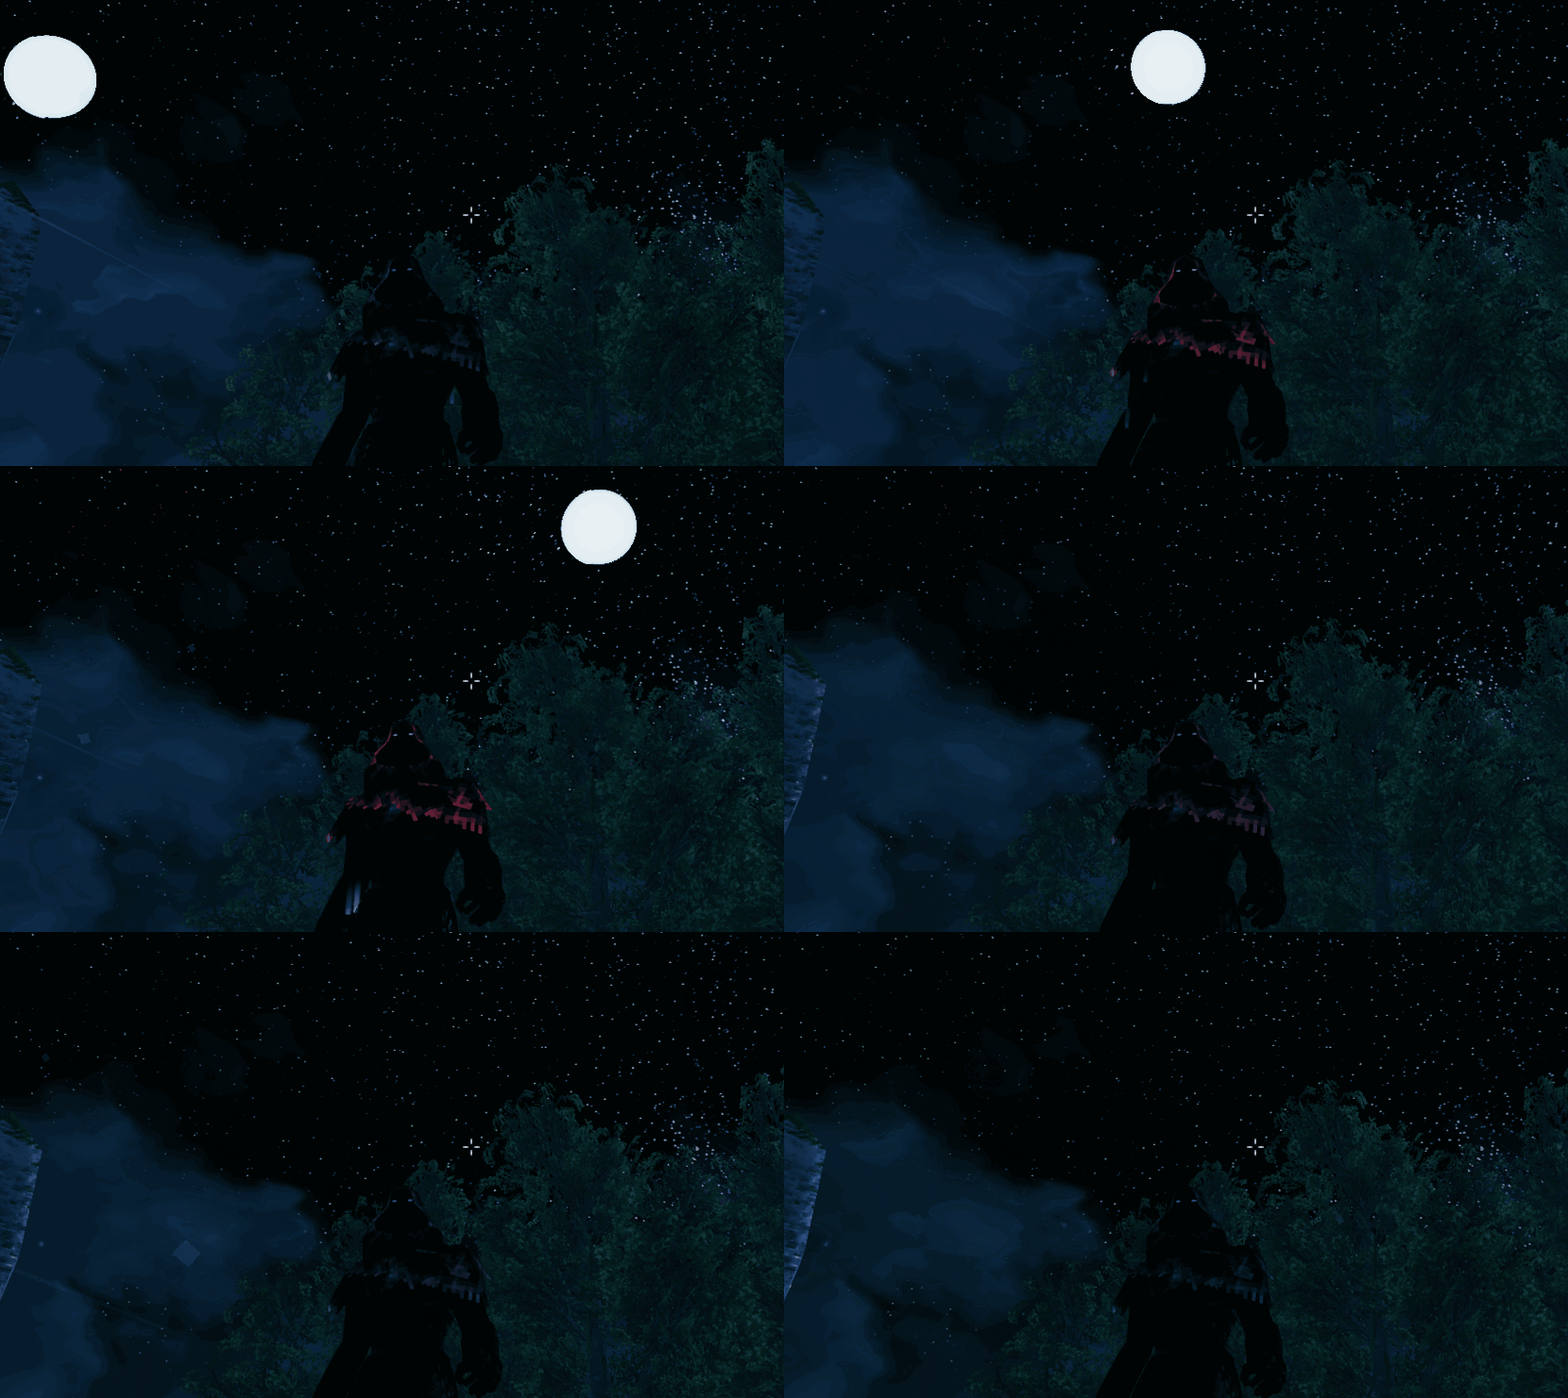
Adding this block to the configuration file for an item will add a time based effect to the item. Where 'time' is the peak of the effect and the 'timeSpan' is the time span on either side of time where the effect starts to work.
effect:
  type: Time
  trigger:
    time: [Hour (number), Minute (number), Second (number)]
    timeSpan: [Hour (number), Minute (number), Second (number)]
  material:
    colors:
      <MATERIAL_PROPERTY_NAME>: [Red (decimal), Green (decimal), Blue (decimal), Alpha (decimal)]
    floats:
      <MATERIAL_PROPERTY_NAME>: (decimal)
Time Effect - Example
prefabName: CharredFenringHelm
material:
  colors:
    _Color: [1, 1, 1, 1]
effect:
  type: Time
  trigger:
    time: [0]
    timeSpan: [4]
  material:
    colors:
      _Color: [2, 1, 1, 1]
    floats:
      _Saturation: 0.85
Schema - Biome Effect
Adding this block to the configuration file for an item will add a biome based effect to the item. The effect will trigger when the user enters the biome specified
effect:
  type: Biome
  trigger:
    biome: AshLands
  material:
    colors:
      _Color: [1, 0.7, 0.7, 1]
      _EmissionColor: [0.7, 0, 0, 1]
Schema - Proximity Effect - WIP (Buggy)
Adding this block to the configuration file for an item will add a proximity based effect to the item. The effect will trigger when the prefab specified comes within proximity of the item.
Currently you need to provide "(Clone)" at the end of the prefab name.
effect:
  type: Proximity
  trigger:
    entities: [Greydwarf(Clone)]
    radius: 50.0
  material:
    colors:
      _Color: [0.7, 0.7, 1.2, 1]
      _EmissionColor: [0, 0, 0.75, 1]
Example Templates
Please note that the material itself must have the properties in the templates below, refer to the describe file for your item, they may be different
Simple Colour Change
# Forces all materials on ArmorFenringChest to Blue
prefabName: ArmorFenringChest
material:
  colors:
    _Color: [0, 0, 1, 1] # [Red, Green, Blue, Alpha] [Values in the range of 0.0 to 1.0]
Colour Change by Hue
prefabName: ArmorFenringChest
material:
  floats:
    _Hue: 0.25 # [Value in the range of -0.5 to 0.5 as specified in the describe example for the "_Hue" property]
Modify Specific Materials
# Sets the first material blue, and the second material red
prefabName: ArmorFenringChest
materials:
- colors: # Targets the first material in the renderer
    _Color: [0, 0, 1, 1]
- colors: # Targets the second material in the renderer
    _Color: [1, 0, 0, 1]
Extended Examples
Forest Armor
This modifies the Mage chest piece and turns it into an earth toned armor with the metal pieces hidden
prefabName: RangerChest
icon: # Updates the icon orientation for the item when snapshot.
  x: -90
  y: 90
  z: 90
texture: # Updates the body paint applied to the player with a screen effect over the base texture.
  name: _ChestTex
  colors:
    - [0.25, 0.15, 0, 1]
material: # Force update all materials with the properties specified
  colors:
    _EmissionColor: [0.02, 0.0, 0.0, 1]
    _MetalColor: [0, 0, 0, 0] # Remove the metal from the armor (alpha 0)
    _Color: [1, 1, 1, 1] # Use default color
  floats:
    _Hue: 0.05 # Adjust the colouration towards orange
    _Saturation: 0 # Remove all saturation
    _Value: -0.01
    _Metallic: 1
    _Cutoff: 0.66 # Adjusts transparency layers removing more fur around the bracer and neck
Sting
Causes the 'Sting' prefab to glow blue when a Greydwarf is nearby.
prefabName: Sting
icon:
  x: -135
  y: -45
  z: 45
material:
  colors:
    _Color: [1, 1, 1, 1]
effect:
  type: Proximity
  trigger:
    entities: [Greydwarf(Clone)]
    radius: 50.0
  material:
    colors:
      _Color: [0.7, 0.7, 1.2, 1]
      _EmissionColor: [0, 0, 0.75, 1]
Examples
Describe:
name: ArmorFenringChest
renderers:
- name: attach_skin
  materials:
  - name: FenringArmor_mat
    shader: Custom/Creature
    materialProperties:
    - name: _MainTex
      type: Texture
    - name: _Color
      type: Color
      value: RGBA(1.000, 1.000, 1.000, 1.000)
    - name: _Hue
      type: Range
      value: 0
      range: -0.5 to 0.5
    - name: _Saturation
      type: Range
      value: 0
      range: -1 to 1
    - name: _Value
      type: Range
      value: 0
      range: -1 to 1
    - name: _Cutoff
      type: Range
      value: 0.702
      range: 0 to 1
    - name: _Glossiness
      type: Range
      value: 0.06
      range: 0 to 1
    - name: _UseGlossmap
      type: Float
      value: 0
    - name: _MetallicGlossMap
      type: Texture
    - name: _Metallic
      type: Range
      value: 0
      range: 0 to 1
    - name: _MetalGloss
      type: Range
      value: 0
      range: 0 to 1
    - name: _MetalColor
      type: Color
      value: RGBA(1.000, 1.000, 1.000, 1.000)
    - name: _EmissionMap
      type: Texture
    - name: _EmissionColor
      type: Color
      value: RGBA(0.000, 0.000, 0.000, 1.000)