
EnemySkinRegistry
Compatibility mod for custom enemy skins.
| Date uploaded | 7 months ago |
| Version | 1.2.0 |
| Download link | AntlerShed-EnemySkinRegistry-1.2.0.zip |
| Downloads | 41287 |
| Dependency string | AntlerShed-EnemySkinRegistry-1.2.0 |
This mod requires the following mods to function
BepInEx-BepInExPack
BepInEx pack for Mono Unity games. Preconfigured and ready to use.
Preferred version: 5.4.2100AinaVT-LethalConfig
Provides an in-game config menu for players to edit their configs, and an API for other mods to use and customize their entries.
Preferred version: 1.4.2README
Enemy Skin Registry
This mod gives developers a means to register client-side enemy skins to be mutually exclusive with other registered enemy skins. It gives users the ability to control when and where those skins will appear, as well as how frequently.
Features
Completed
- LethalConfig-accessible GUI for end users to set configurations
- Registration of custom Skin implementations
- Configurable distribution of skins per enemy
- Configurable distribution of skins per moon
Implemented but not fully tested
- Custom Enemy Registration
- Custom Moon Registration
- Event Listeners for BaboonHawk and Bracken
Planned
- Event Listeners for remaining vanilla enemies
- Default configurations for modded moons
User Guide
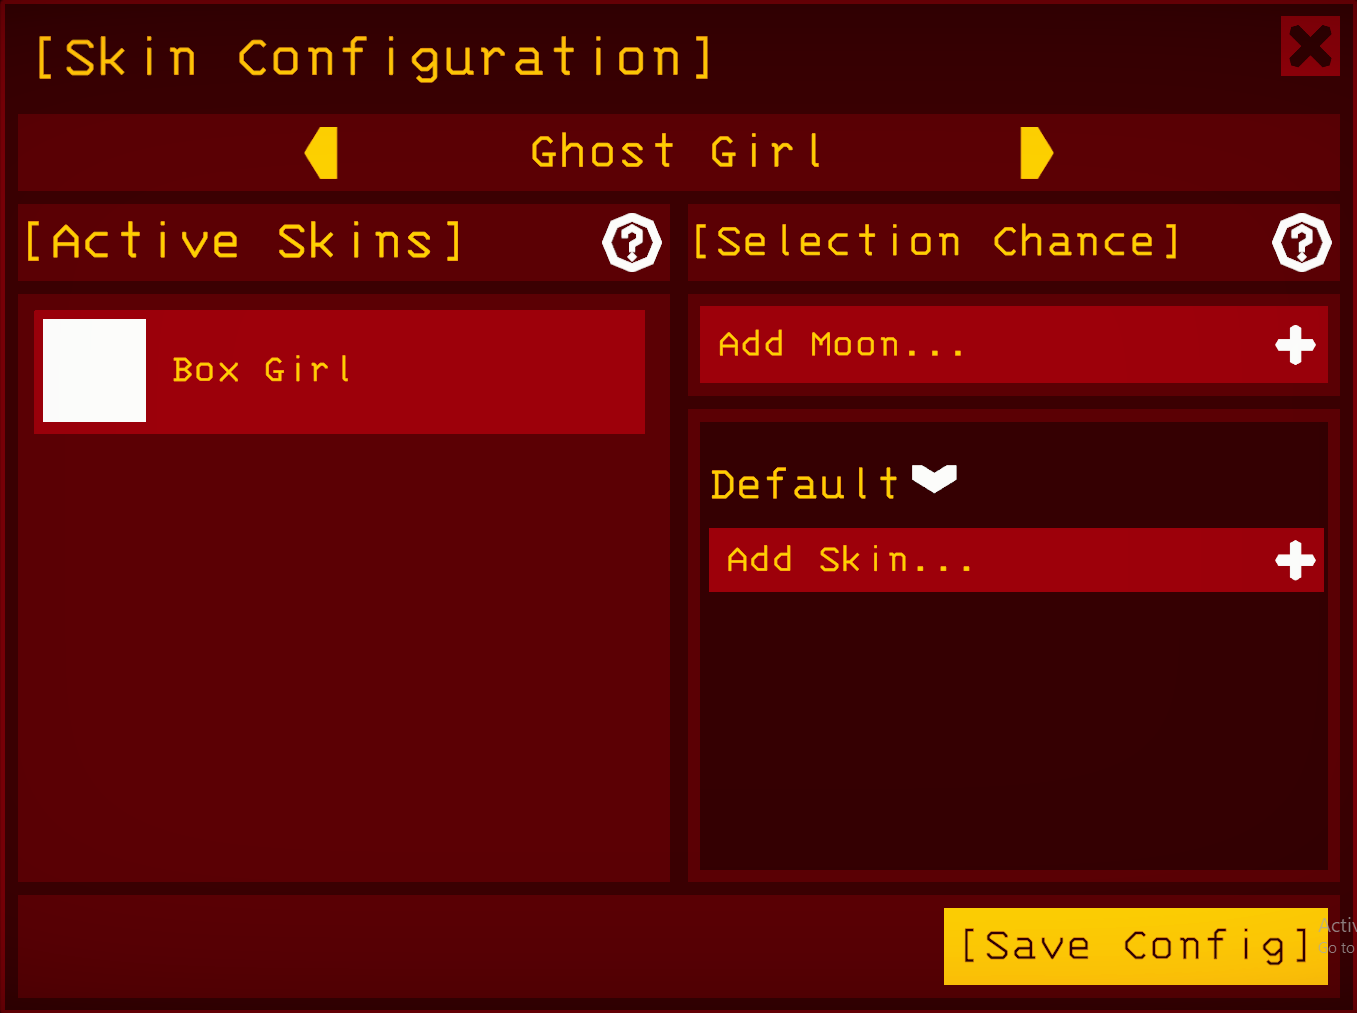
The enemy skin configuration is accessible through the Lethal Config menu.
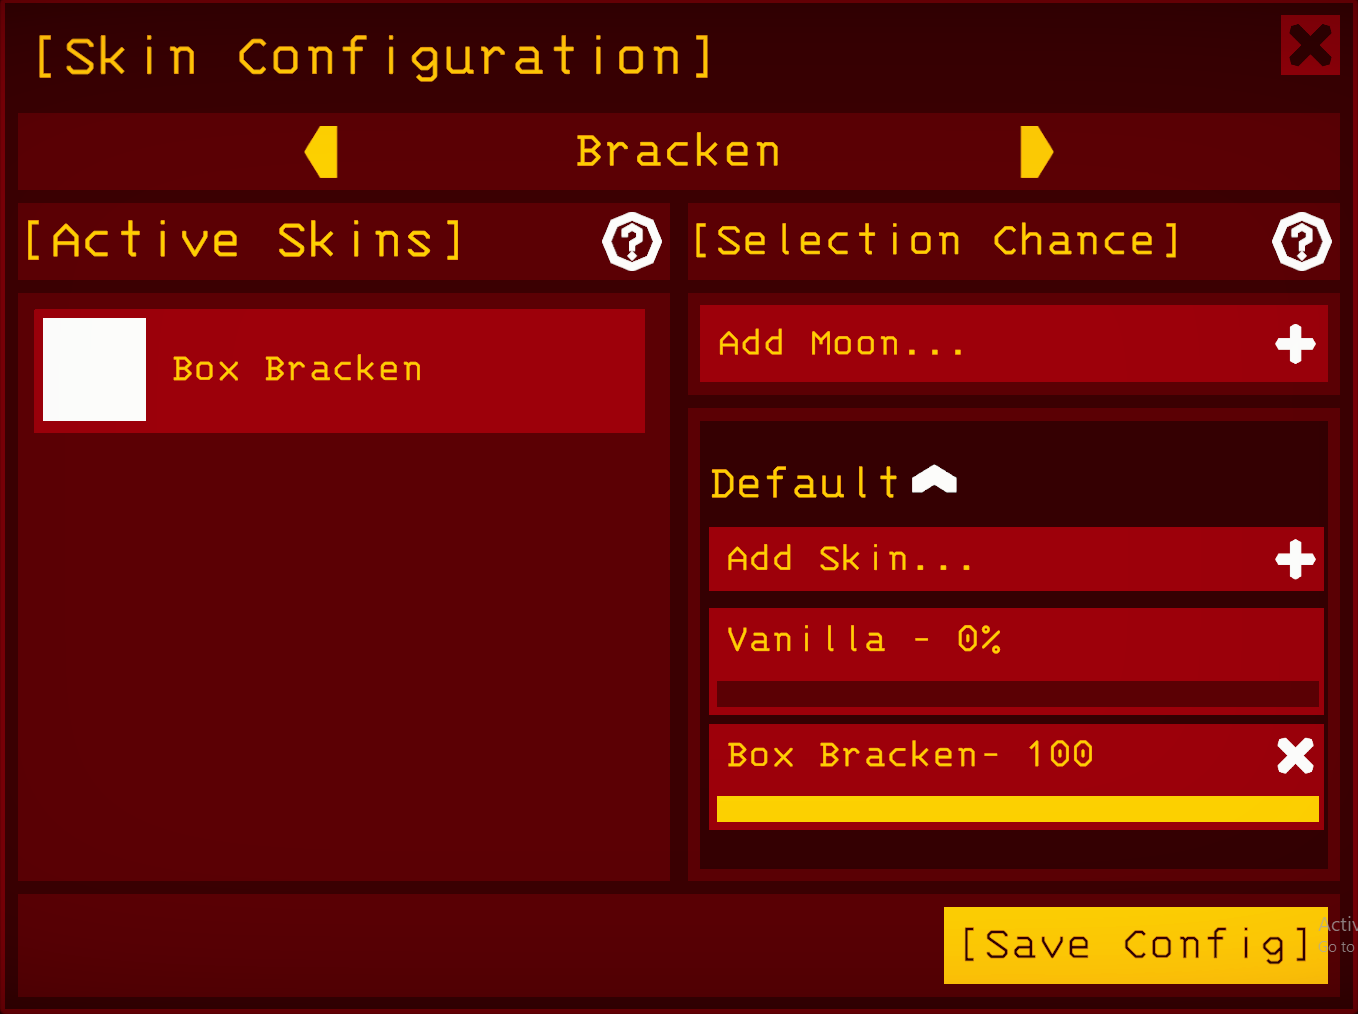
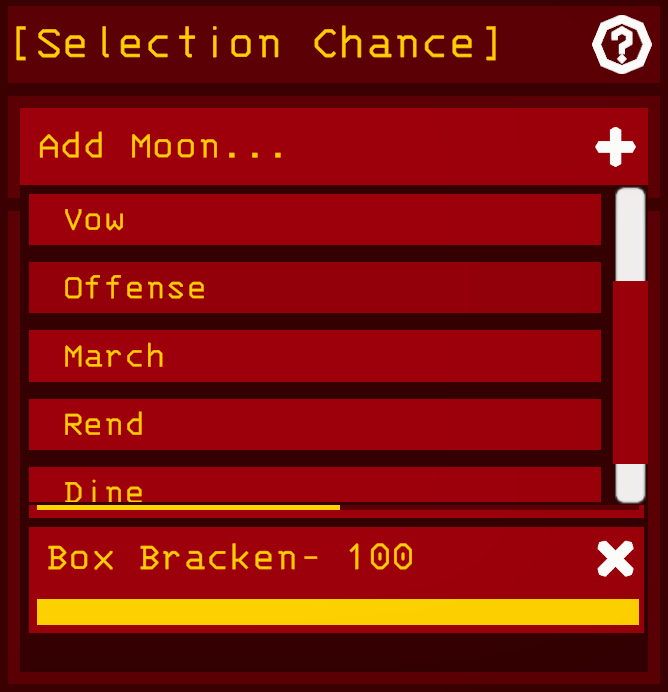
The top bar will let you scroll through the registered enemies. Use the right and left arrows to navigate through them. The name of the enemy in the middle will have its configuration displayed in the rest of the ui below.
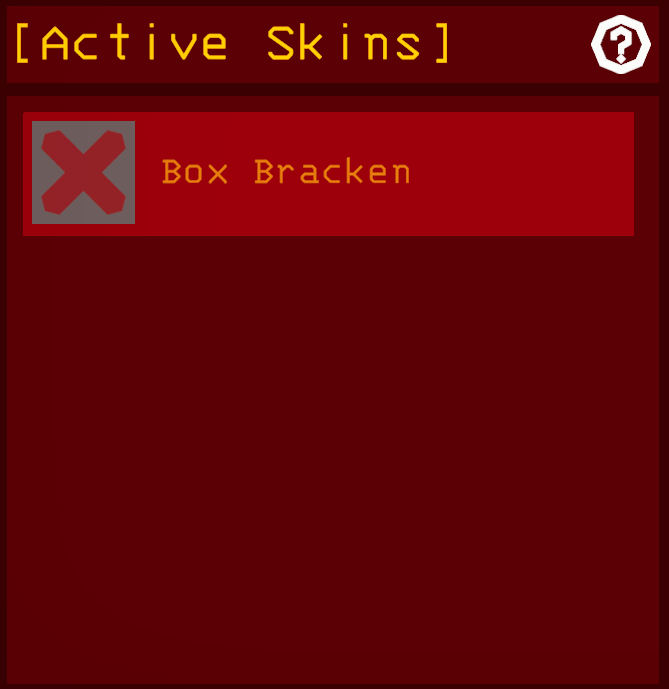
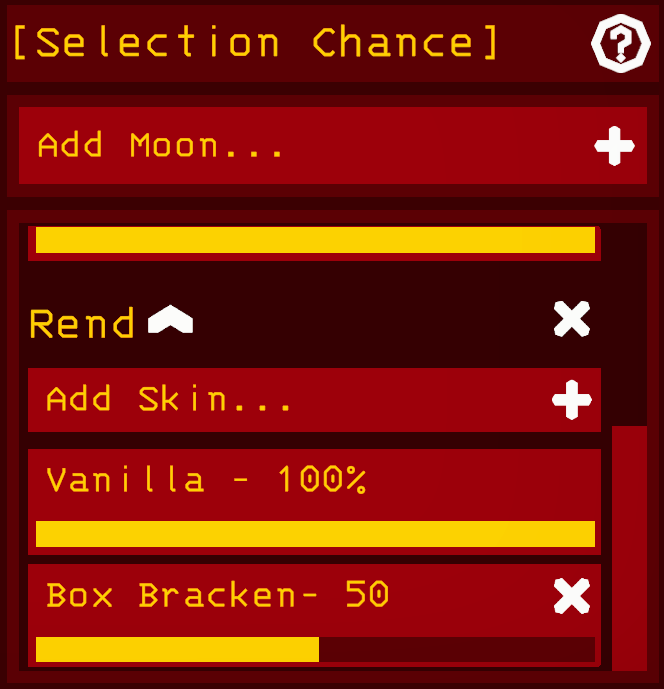
The panel in the lower left may be used to activate and de-activate registered skins. Click the skin's icon on the left side of each entry to toggle whether an enemy can spawn with this skin or not. Deactivation works mid round to allow for buggy skins to be removed if they are causing problems. This is the only time where adjusting the config will change any already-spawned enemy.
The panel in the lower right is used to configure the likelihood of a skin being selected when an enemy of a particular type spawns. Each moon can be given its own distribution of skins. The "Default" distribution is for any moon that does not have an explicit distribution. Add a skin to a distribution by clicking the "Add Skin..." dropdown on a configuration.
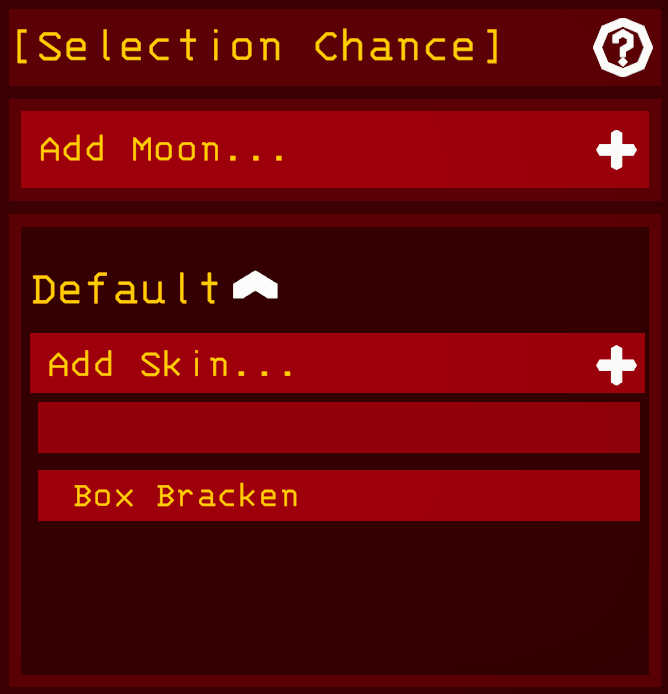
Each skin on each moon can be set to spawn more or less frequently. Setting the bar to the max will make it take up all of its fair share of the remaining spawn chance, and setting the bar to nothing will make it never spawn. So if you have three skins all set to the max value, they'll each have a 1/3 chance of spawning. But if you set two of those skins to half, then the distribution becomes 1/4, 1/4, 1/2.
Add a distribution for a moon by clicking the "Add Moon..." dropdown.
Any default configurations modders have included with their mod will appear in the dropdown menu just above the "Save Config" section of the GUI. Select an item from that dropdown to reset to the mod's default skin-map distribution.
Finally, hit the "Save Config" button to save any changes. Changes are immediately applied to skin selection rates and will affect any enemies that spawn after. Changes will not affect enemies that have already spawned except in the case of deactivating skins.
For Developers
Getting this mod as a dependency
To add this mod to your project, I'd recommend using ThunderKit. But if you'd rather avoid using it, you can simply download this mod and use it like a unity package.
Adding a Custom Skin Implementation
This mod has a companion mod with default skin implementations that allow for a codeless approach. However, if that approach is too limiting for what you need to get done, then you can still create a skin mod that's compatible with this one by following these steps. For this I'm assuming you have some programming experience.
1. Implement the Skin interface
Implementors of the Skin interface are required to provide a handful of metadata:
- Label - The name of the skin as it will show up in the configuration menu
- Id - The unique id of the skin. To help enforce uniqueness, it's recommended that ids follow the pattern "<AuthorName>.<SkinName>"
- EnemyId - The unique id string of the enemy type the Skin will be attached to.
- Icon - A Unity Texture2D to be used as the skin's icon so it can be previewed in the configuration menu
Along with this information, the Skin interface follows the abstract factory pattern to produce Skinners. Each time an enemy spawns, a Skin is picked based on the user configuration and asked to create an instance of Skinner. Each Skin has an enemy type and each Skinner is mapped to an instance of that corresponding type.
class MySkin : Skin
{
    public Skinner CreateSkinner()
    {
        //Return your skinner implementation from here
    }
}
2. Implement the Skinner interface
The Skinner interface is only required to implement two methods:
class MySkinner : Skinner
{
    void Apply(GameObject enemy)
    {
        //Perform any logic here to modify the appearance of the enemy. All of it must be client-side.
        //This is also the point where an EventHandler is registered if your skinner makes use of it. To do so, call EnemySkinRegistry.RegisterEventHandler(enemy, MyEventHandler)
    }

    void Remove(GameObject enemy)
    {
        //Restore the enemy to its vanilla appearance, undoing all of the changes done by Apply.
        //Unregister the event handler by calling RemoveEventHandler(enemy) if you registered one.
    }
}
For vanilla enemies, the game object passed to these methods is the one containing the EnemyAI component. Applying a skin to a modded enemy will require the author of the enemy mod to add calls to the registry from their logic, or third-party patching. This is covered elswhere in this document.
3. Call RegisterSkin
Once you have implemented both of these classes, call the following from the Awake method in your plugin:
EnemySkinRegistry.RegisterSkin(new MySkin());
Note that this does nothing for creating and reading from asset bundles. Resolution of dependencies on textures, models, animations, sounds, and other assets that a Skin or Skinner might have is the responsibility of the developer.
Optionally you may include a default configuration for your skin:
MySkin mySkin = new MySkin();
EnemySkinRegistry.RegisterSkin
(
	mySkin,
	new DefaultSkinConfigData
	(
		//List of moon-id to frequency pairs
		// 0.0 means it never appears, 1.0 means it appears 			//as frequently as possible when considering other 			//skins
		new DefaultSkinConfigEntry[]
		{
			new DefaultSkinConfigEntry
			(
				EnemySkinRegistry.OFFENSE_ID,
				1.0f
			),
			new DefaultSkinConfigEntry
			(
				EnemySkinRegistry.MARCH_ID,
				0.5f
			),
		},
		//Default frequency
		//The frequency of this skin on any unconfigured map
		0.0f,
		//Vanilla fallback frequency
		//Optional - frequency of the vanilla appearance if 			//this default config ends up making a new config 			//entry for the enemy on a moon
		0.0f
	)
);
Event Handlers
Enemy Event handlers are an in-progress feature to allow developers to fully overhaul an enemy's appearance without relying on asset replacement. Enemies will notify a handler class that a certain event has occured, e.g. a bracken snaps a player's neck or a blind dog lunges, and that handler will run some logic when that happens.
To receive events from an enemy, implement its corresponding EventHandler class and then call
EnemySkinRegistry.RegisterEnemyEventHandler(EnemyAI enemyInstanceAIComponent, EnemyEventHandler myEventHandler);
in your Skinner's Apply method, then call
EnemySkinRegistry.RemoveEnemyEventHandler(EnemyAI enemyInstanceAIComponent);
in your Skinner's Remove method.
Only one handler per instance may be registered at a time.
Registering a Modded Enemy
The only thing that needs to be done to add a modded enemy to the registry is a call to RegisterEnemy
RegisterEnemy(string enemyId, string label);
The enemy id is the unique Id of the modded enemy type. Again, it is recommended to follow the pattern <ModAuthorName>.<ModdedEnemyType> to ensure that this id is unique even when other mods are installed. The label is how it will appear in the GUI.
From there, in your enemy's implementation, probably in its start method or at some point when it's spawning, call:
Skin randomSkin = EnemySkinRegistry.PickSkin(myModdedEnemyId);
EnemySkinRegistry.ApplySkin(randomSkin, myModdedEnemyId, enemyGameObject);
For vanilla enemies, "enemyGameObject" is the game object that contains the EnemyAI component, but you can put whatever suits your fancy as long as anyone trying to change the appearance of your enemy can reasonably get at what they need to change the appearance of your modded enemy instance. If you do go against this convention, make sure anyone trying to make a skin mod for your enemy is aware of this.
Skins also have the option to register EventHandler implementations for enemies during the call to apply. To get a reference to the EventHandler for one of your modded enemy instances, call
EnemySkinRegistry.GetEnemyEventHandler(enemyGameObject);
This will be null if no handler was registered or if the skin was removed.
Here, enemyGameObject is the same game object used in the call to Apply. All EnemyEventHandlers come with a handful of common events (Spawn, Hit, Die, Stunned etc.). These common events are handled by the patcher inculded in this mod. However, you can give other modders more functionality by extending the EnemyEventHandler interface with events epecific to your enemy.
interface MyEnemyEventHandler : EnemyEventHandler()
{
    void OnDoThing(ModdedEnemyAI enemyAI, <OtherParams>);
    ...
}
and then in your enemy logic:
class MyEnemy : EnemyAI
{
    //whoa, this is some snazzy custom enemy code

    void DoThing()
    {
        ...
        (EnemySkinRegistry.GetEnemyEventHandler(this) as MyEnemyEventHandler)?.OnDoThing(this);
        ...
    }

    //golly! even more immaculate enemy code!
}
This way, modders can have their skins do something in response to your enemy doing "Thing."
Registering Modded Moons
To add your modded moon to be configurable in the menu, just call
EnemySkinRegistry.RegisterMoon(string planetName, string configLabel, DefaultMapConfigEntry[] defaultConfig = null);
Where "planetName" must match the field of the same name in your moon's SelectableLevel object. The field "configLabel" is how your moon will appear in the GUI. For the vanilla moons, I omitted the number, but you're free to do whatever pleases you. "defaultConfig" is an optional field which lets a moon author supply a default skin configuration for their moon, allowing for modded moons to match skins to their theme by default.
EnemySkinRegistry.RegisterMoon
(
	"13 Buck",
	"Buck",
	new DefaultMapConfigEntry[]
	{
		new DefaultMapConfigEntry
		(
			//id of the enemy
			EnemySkinRegistry.THUMPER_ID,
			//vanilla frequency
			0.0f,
			//skins
			new SkinConfigEntry[]
			{
				new SkinConfigEntry(1.0f, "antlershed.ReindeerThumper"),
				new SkinConfigEntry(0.2f, "antlershed.RedNoseReindeerThumper"),
			}
		),
		new DefaultMapConfigEntry
		(
			EnemySkinRegistry.EYELESS_DOG_ID,
			0.5f,
			new SkinConfigEntry[]
			{
				new SkinConfigEntry(1.0f, "antlershed.BlindElk"),
			}
		)
	}
);
So on my deer-themed moon "13 Buck," the vanilla thumper would not appear. Instead, the regular reindeer thumper would spawn most of the time (10/11), and the red-nosed reindeer thumper would spawn pretty infrequently (1/11). The elk dog would spawn 2/3 of the time and the vanilla blind dog would spawn 1/3 of the time.
##To-Dos
- Add more documentation
CHANGELOG
Changelog
1.4.6
- Added a GetSkin API call.
1.4.5
- Added back in patchers that got removed getting this project back on github. Should fix some audio issues.
1.4.4
- Made some API methods static so modders could actually get at it. Whoops.
1.4.3
- Added Maneater key and events (kinda. he didn't need any)
- Added a few API calls to make it easier for modders to interact with skins
- ReassignSkin will let modders manually assign a skin to a spawned enemy. Chaos.
- RemoveSkinner has been reworked to actually call the Remove method of the assigned skinner
- GetSkinId will let modders keep tabs on what skin is assigned to what enemy
- GetEnemyId will let modders get the SkinRegistry's enemy type of an enemy with a skin assigned to it. This is necessary if you need to know if a skin will be compatible at runtime.
- Removed a handful of deprecated methods no one was using. No one was using them, right?
1.4.2
- Added keys and event handlers (just audio events) for circuit bees, manicoils, and roaming locusts.
- Added event for Mask Hornet spawn
- Fixed overwites not working
- Changed "Add Moon..." text in config menu to "Add Moon/Tag..."
1.4.1
- Changed tag handling to average all applicable tags instead of picking one applicable tag at random
- Fixed LLL tags to pull from the correct field
1.4.0
- Removed support for 1.2.0 bepinconfig profiles (if you used 1.3 at all it should've already carried over)
- Added tag-based skin spawn configurations. Now before going to the default map config, if a config with an applicable tag exists, it will choose that config instead. Tags from LLL moons are automagically registered.
1.3.8
- Fixed a small bug in the deserialization of config messages sent when syncing
- Made skin configuration menu viewable and readonly on synced clients
- Moved sync messaging patch to player class
- Removed pointless bookkeeping and supporting pathes that were probably causing issues with LLL
- Added a couple more log statements (as a treat)
- Removed a bunch of unused using statements
- Got rid of some dead code in the sync profile method
1.3.7
- Actually fixed skin sync messages not getting sent at the correct times (crowd boos)
1.3.6
- Fixed issue where GUI was not updating when a default config was being applied
1.3.5
- Fixed issue where skins with a default config were inactive by default
- Sync messages are now deployed when config settings are changed
1.3.4
- Percentages are back by purpular request. These now Display the actual spawn percentages rather than the percent of their available weight. A little more useful.
- Fixed issue where profiles weren't appearing in the dropdown after being created
- Fixed issue with default skin profiles failing to apply
- Fixed issue where new skins were always having their default frequency set to 1 even if their default config said otherwise
1.3.3
- Added note on how to handle LLL soft dependency causing errors in the editor
1.3.2
- Actually removed the debug statements (crowd boos)
1.3.1
- Fixed old birds messing with the config synchronization
- Fixed stale active skins hanging around in config profiles
1.3.0
- Added profile storage. Profiles can now be stored locally and loaded in the same way default moon and skin configs are.
- Added client-host syncing
- Tweaked random number generation
- Added separate frequencies for indoor outdoor spawning
- LLL moons are now automagically registered
- Profiles are no longer stored in bepin config file
- Added events and vanilla entries for Tulip Snake, Kidnapper Fox, and Barber enemies
1.2.0
- Added default configurations for Moons
- Added default configurations for Skins
- Added controls in the gui for reapplying default configurations
- Removed the 0 - 100 frequency counts in the ui
- Added ids for v50 enemies and moons
- fixed skin icons not displaying
- Added several new enemy events primarily to allow for more comprehensive modded sounds.
1.1.0
- Added Events for ghost girl
- Added Changelog
1.0.1
- Added images to ReadMe
1.0.0
- Initial release